You do not need “more traffic” if your site is leaking leads. A high-performing roofing landing page is a focused page that turns urgent intent (leaks, storm damage, missing shingles) into a call, a form submission, or a booked inspection without making people hunt.
This guide shows you how to build a roofing landing page that converts, what to include, what to avoid, and how to connect the page to follow-up so leads do not go cold.
What a roofing landing page is and what it must do
A roofing landing page is a single-purpose page designed to convert one audience with one primary action.
For roofing, that primary action is usually:
- Call now: Best for emergency and storm damage, where speed matters more than long-form persuasion.
- Request a free inspection: Best for general repair and replacement, where homeowners want a low-risk next step.
- Get a quote: Best when you can qualify quickly (roof size, material, timeline) and respond fast with pricing ranges or a firm estimate process.
A landing page is not a homepage. It should not try to explain your entire company. It should remove uncertainty and make the next step feel safe.
Choose one conversion goal and one offer
Before you touch layout or copy, decide the one thing the page is trying to produce. This choice affects every design and copy decision that follows, from the hero button label to the form fields you include.
Good roofing offers are concrete and low-friction:
- Free roof inspection: Works when you can operationally support scheduling and dispatch without long delays.
- Same-day emergency tarping: Works when response time is a true differentiator and you can consistently deliver it.
- Storm damage assessment for insurance: Works when you can document damage clearly and guide homeowners through the next steps.
- Financing pre-check: Works when replacement is the main sale and you have a clean handoff from “interest” to “approved and scheduled.”
Make the offer specific enough that the visitor can instantly answer: “Is this for me?”
Roofing landing page layout that converts
Use a simple structure that matches roofing buying behavior: urgency first, proof second, details third.
High-converting sections, in order
| Section | What to include | Why it matters |
|---|---|---|
| Hero | Clear headline, service area, one call to action (CTA) | Sets relevance in 2 seconds and prevents pogo-sticking back to Google. |
| Trust bar | Licensed/insured, warranty, years in business, review rating | Roofing is a high-trust purchase. Proof reduces fear. |
| Services | 3 to 5 cards max (repair, replacement, storm damage, gutters) | Helps visitors self-select fast. |
| Social proof | Short testimonials, review snippets, before/after photos | Validates that you deliver the outcome they want. |
| Process | 3 steps: inspect, quote, schedule | Makes the next step feel predictable. |
| Financing and warranties | Simple bullets, no fine print on-page | Handles price anxiety without a long sales pitch. |
| Service area | City list or embedded map, “Serving X and nearby” | Confirms you actually cover their location. |
| FAQ | Insurance, timeline, materials, cleanup | Handles objections and reduces form abandonment. |
| Sticky contact | Click-to-call + short form | Keeps the action available without scrolling. |
Write copy that wins the click and the lead
Roofing copy should be direct, local, and outcome-based. Avoid “we are passionate about roofs.” Use language your customer already uses.
Hero copy template you can adapt
- Headline: “Roof Repair and Replacement in [City]”
- Subheadline: “Fast inspections, clear quotes, and clean job sites. Licensed and insured.”
- Primary CTA button: “Get a free inspection”
- Secondary CTA link: “Call now”
Service card copy template
- Title: “Storm Damage Roofing”
- 1-sentence promise: “We document damage, explain options, and help you move fast.”
- Micro-proof: “Photo reports available” or “Emergency tarping when needed”
Bullet rules for roofing pages
- Outcomes first: Lead with what the homeowner wants (stop the leak, prevent interior damage, protect resale value), then back it up with how you deliver.
- Specifics you can defend: Mention materials, warranties, cleanup practices, and response windows only when they reflect how your team actually operates.
- Plain language: If you must use terms like “underlayment,” define them in one clean line so readers do not feel out of their depth.
Add trust signals that reduce risk
Most roofing leads are not comparing ten contractors. They are trying to avoid a bad decision.
Include trust signals that are easy to verify:
- Licensing: State that you are licensed and insured plainly and keep it near the top of the page so it is not hidden behind scroll depth.
- Warranty clarity: Explain what you warranty (workmanship, materials) at a high level so people understand what “covered” means without reading fine print.
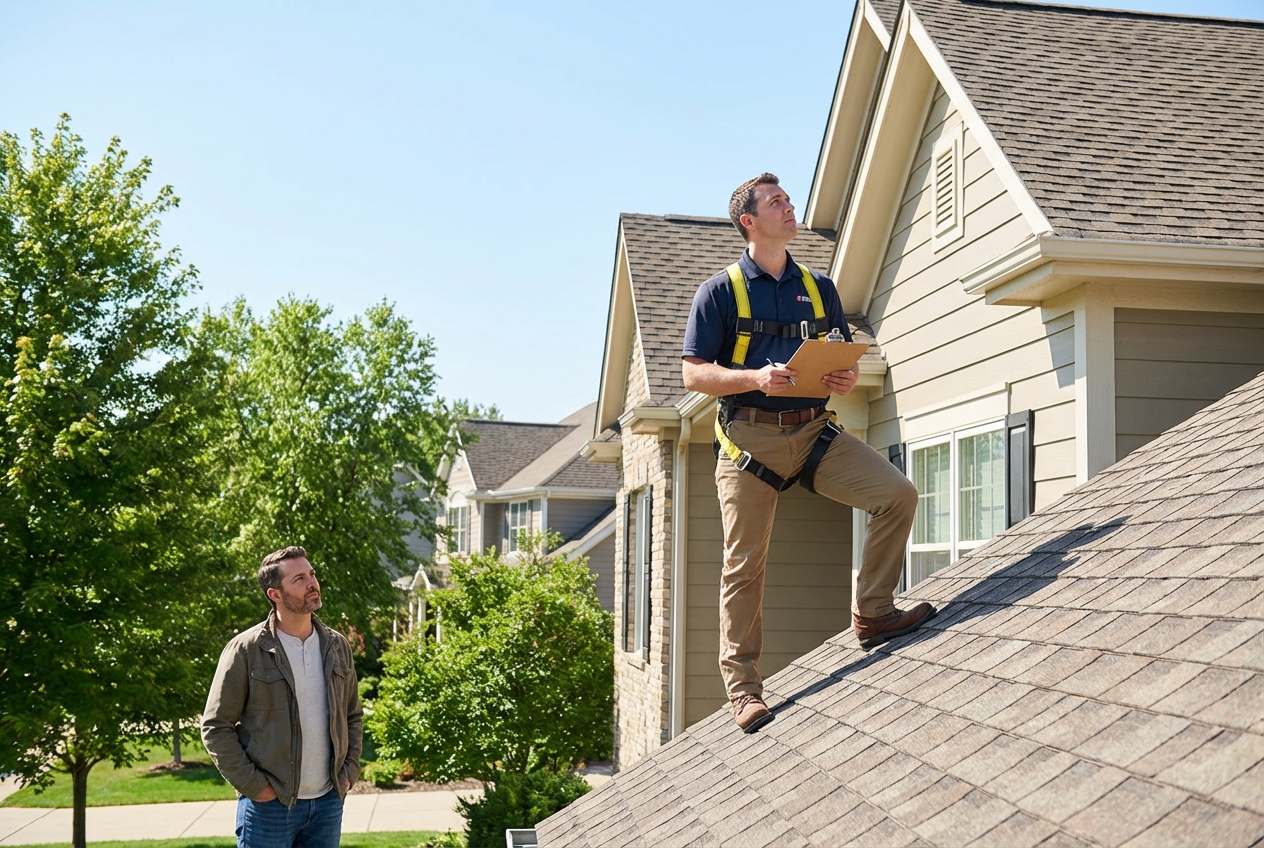
- Real project photos: Use your own before/after images whenever possible because stock photos raise suspicion in home services.
- Review proof: Show a rating and a small number of short quotes that speak to the outcomes homeowners care about (cleanup, communication, leak solved).
If you use testimonials and endorsements, ensure they are not misleading and that any material relationship is disclosed. The United States Federal Trade Commission explains these requirements in its guidance on endorsements and testimonials in the FTC’s Endorsement Guides.
Build the lead capture system, not just the page
A roofing landing page fails most often after the conversion. Someone submits a form, then waits.
Design your follow-up like a system. The goal is to reduce the time between “raised hand” and “real conversation,” because roofing urgency decays quickly.
If you want a practical model for what to automate first, our guide to lead management automations is a useful reference point.
Forms: keep them short, but make them useful
Aim for 4 to 6 fields. That is usually enough to route leads properly without creating friction.
- Name: Lets you personalize the first call or text, which increases response rates.
- Phone: Still the fastest close for roofing, especially when the homeowner has active damage.
- Address or ZIP code: Confirms service coverage and helps you plan dispatch.
- Issue type: Leak, missing shingles, storm damage, full replacement. This lets you triage and prepare.
- Timeline: Emergency, this week, this month. This sets urgency and supports scheduling decisions.
If you add more fields, only do it when it changes operations. For example, “Is this for insurance?” can route to the right estimator.
Calls: make click-to-call effortless
- Hero phone placement: Put the phone number in the hero where a mobile user can act without thinking.
- Sticky call bar: Keep a persistent tap-to-call option as people scroll, so proof does not become a dead end.
- Truthful labels: Use a label like “24/7 emergency line” only if it is true and staffed.
Lead routing: speed matters
Even a simple routing approach makes a difference:
- Instant notification: Send new leads to the right person immediately, not “when someone checks the inbox.”
- Auto-reply confirmation: Confirm receipt and set expectations (“We will call within 15 minutes during business hours”) so people do not keep shopping.
- Scheduling link: Offer a slot only if your calendar is accurate and you can honor the appointment windows.
For a deeper follow-up sequence (confirmation, nurture, re-engagement), our overview of CRM sales automation maps well to roofing lead flow.
Make it fast and mobile-first
Your roofing clicks skew mobile. Your page must feel instant.
Focus on Core Web Vitals, which are user experience metrics defined by Google. Web.dev lists “Good” thresholds for Largest Contentful Paint (LCP), Interaction to Next Paint (INP), and Cumulative Layout Shift (CLS) in Web Vitals.
Practical improvements that usually move the needle:
- Optimized images: Compress and resize images, especially hero photos and before/after galleries, so mobile users are not stuck waiting.
- Stable layout: Set image dimensions and reserve space for dynamic components so content does not jump while loading.
- Controlled overlays: Avoid aggressive pop-ups and chat takeovers on mobile, because they block the CTA and increase bounce.
If you plan to run paid search, you also want to avoid compliance issues. Google Ads expects ad destinations to be functional, useful, and easy to navigate; review the Google Ads destination requirements before you scale spend.
Cover accessibility basics so more people can convert
Accessibility is not just a compliance topic. It is also a conversion topic.
Start with straightforward wins:
- Alt text: Add alt text to key images, especially before/after photos, so screen reader users can understand what you are showing.
- Form labels: Label form fields explicitly and do not rely on placeholder text, which disappears as soon as someone types.
- Keyboard navigation: Ensure keyboard navigation works and focus states are visible, so people can complete forms without a mouse.
- Readable contrast: Use high-contrast text and buttons; light gray on white is a common failure that quietly reduces conversions.
The World Wide Web Consortium (W3C) Web Accessibility Initiative summarizes these requirements in the WCAG 2.2 quick reference.
Create local relevance without turning the page into an SEO essay
A roofing landing page can rank and convert, but conversion comes first.
Add local relevance where it helps decision-making:
- Hero service area: Add one clean line like “Serving [City] and surrounding areas” to confirm relevance instantly.
- Short city list: Include a scannable list near the bottom for coverage confirmation without turning the hero into a keyword wall.
- Local proof: Use real projects, team photos, and recognizable neighborhoods where possible, because local trust is more persuasive than local keyword density.
Avoid stuffing every suburb into the headline. It reads spammy and does not build trust.
Step-by-step: build your roofing landing page
This is a practical build sequence that keeps you focused on outcomes.
1) Draft the page in a single document
Start in a doc, not a builder. The document forces clarity before design, which prevents you from “decorating” your way into a confusing page.
Write:
- Messaging: The hero headline and subheadline, written for one service area and one audience.
- Offer: The one low-friction offer you are prepared to operationalize.
- Services: The 3 to 5 services you want to sell from this page.
- Proof: The trust signals you can honestly show (photos, reviews, licensing, warranties).
- FAQs: The questions you get on the phone every day, rewritten in plain language.
Outcome: you get a page that has a message, not just a layout.
2) Choose your builder based on how much workflow you need
If all you need is a page, most landing page builders work. But if you want the landing page to behave like an intake system (lead routing, scheduling, follow-up, and a lightweight customer relationship management (CRM) view), choose based on workflow, not just page design.
| Option | Best for | Tradeoffs |
|---|---|---|
| Unbounce / Leadpages | Fast A/B testing and simple funnels | You may still need separate tools for scheduling and lead management. |
| Webflow | Design control | More build time and more decisions. |
| Wix / Squarespace | Quick brochure sites | Can be limiting for custom lead workflows. |
| A custom intake app | Roofing teams who want routing, scheduling, and visibility in one place | More setup up front, but fewer operational gaps later. |
In my professional opinion, the moment you care about response time, routing, and scheduling, a workflow-first build usually beats stitching together five tools. QuantumByte is built for that “page plus intake workflow” approach, and Packets is the fastest way to ship a first version and iterate.
3) Build the page sections and connect your form
Build the user interface (UI) in the same order a homeowner makes decisions. You want the first screen to answer “Am I in the right place?” and “What do I do next?” Then you layer in proof, details, and objections.
A clean way to assemble it is to build each section and immediately connect it to the primary action, so nothing becomes a dead end:
- Hero and primary action: Add the headline, service area, and the main CTA. Then wire the button to either click-to-call (for emergency) or a short form (for inspection requests) so the most important interaction is real from day one.
- Trust bar: Place licensing/insurance, review rating, and warranty signals near the top. This works because roofing is a high-stakes purchase and visitors look for reassurance cues before they commit.
- Services and self-selection: Add 3 to 5 service cards. Each card should point back to the same primary CTA so people do not get stuck reading.
- Proof and predictability: Add a few before/after photos, short testimonials, and a simple 3-step process. This reduces anxiety by showing that the job will be handled professionally.
- FAQ and objection handling: Add the questions that typically stop a lead from submitting. The goal is fewer “I’ll think about it” exits.
- Sticky contact: Add a persistent call button and a lightweight “request inspection” path so the conversion option is always available.
Outcome: the page is usable and conversion-ready even before you polish every detail.
4) Add a simple follow-up workflow
Do not wait until “later.” Later becomes never.
Your follow-up workflow should do two things: confirm to the homeowner that help is on the way, and make it hard for your team to miss the lead.
At minimum:
- Instant confirmation: Show a thank-you message that sets expectations (“We will call within 15 minutes during business hours”) so the homeowner feels the request worked.
- Internal alert: Notify your dispatcher or estimator immediately (email, text, or team messaging) so response time does not depend on someone checking a dashboard.
- Lead log: Store each submission in one place with issue type and timeline so follow-up calls are informed, not generic.
If you are trying to scale a home service business without adding admin headcount, our breakdown of how to scale a service business without hiring includes practical automation targets that map cleanly to roofing intake.
5) QA like a buyer, not a builder
Quality assurance (QA) is where conversion rate is won or lost. Your goal is to spot friction that feels “small” to you, but feels risky to a homeowner who is already stressed.
Test the page on your phone with one hand, and assume the visitor is in a hurry.
- Tap test: Confirm the phone number is tappable, the button is large enough, and the call action works without zooming.
- Form test: Submit a test lead and read the confirmation like a nervous homeowner. It should feel specific, calm, and trustworthy.
- Proof test: Make sure licensing, insurance, and review proof are easy to find without scrolling forever or hunting in footers.
- Speed test: Load the page on cellular data and watch for layout shifts, stalled hero images, or slow-loading galleries that hide the CTA.
Outcome: you catch the small friction points that kill conversions.
What to automate after the page is live
Once the landing page is converting, your next bottleneck is operations. Automation helps you scale without hiring a bigger admin layer.
In my professional opinion, the highest-return automations are the ones that shorten response time and reduce “follow-up drift” after the inspection.
Automations that often pay back quickly:
- Lead qualification: Route “emergency leak” differently than “replacement this year” so urgent jobs get immediate attention.
- Scheduling: Let qualified leads pick inspection slots so your team is not doing calendar ping-pong all day.
- Quote follow-up: Send reminders after 24 hours and 72 hours if there is no decision, with an easy way to ask a question or book the next step.
- Job prep checklist: Standardize photos, measurements, material selection, and permit notes so jobs start clean and fewer details are missed.
If you want a broader menu of sales-side automations (lead capture, pipeline updates, follow-ups), our list of sales automation processes can help you choose what to implement next.
When QuantumByte Enterprise makes sense for roofing organizations
If you operate multiple crews, multiple locations, or you need governance around data and workflows, you will eventually outgrow a “page plus a few integrations” setup.
That is where an enterprise build approach becomes relevant:
- Centralized control: Run intake, dispatch, estimates, and reporting from one system so teams do not operate from conflicting spreadsheets.
- Cross-functional workflows: Connect sales, operations, and finance so handoffs are consistent and nothing falls through the cracks.
- Scalability: Add a new location without rebuilding your entire lead and scheduling stack.
If that is your direction, our Enterprise offering is the right next step.
Summary of what you built
You now have a practical blueprint for a roofing landing page that converts:
- One goal and one offer: A single action that matches your operation and your market’s urgency.
- A proven layout: Urgency first, proof second, details third, with a sticky contact option.
- Copy templates: Simple language that matches how homeowners choose roofers.
- Trust, accessibility, and performance basics: The fundamentals that reduce risk and increase mobile conversions.
- A lead capture and follow-up system: The part most pages miss, and the part that prevents leads from going cold.
- A path to automation: What to automate next and when enterprise-grade workflows start to matter.
Frequently Asked Questions
How long should a roofing landing page be?
Long enough to remove doubt, short enough to stay focused. For most roofers, a single page with a hero, proof, services, FAQ, and a sticky contact bar is sufficient. Add length only when it answers real objections you hear every day.
What is the best call to action for a roofing landing page?
In my professional opinion, “Get a free inspection” is usually the safest default because it feels low-risk, but “Call now” often wins for emergency intent. The best choice depends on your operations. If you cannot respond quickly to calls, prioritize the form and scheduling path.
Should I make separate landing pages for roof repair and roof replacement?
In my professional opinion, yes if you are running ads or targeting specific keywords. Separate pages let you align the headline, proof, FAQs, and offer to one intent. Start with one strong page, then duplicate and specialize.
Do I need a chat widget?
Only if you can staff it well or automate it without being frustrating. A poorly handled chat creates distrust. A fast call flow and a clean form usually outperform chat for roofing.